Friday 13 June 2014

Ujian Lee Big Stopper -vs- Haida ND

Assalamualaikum wbt.

Filter Neutral Density (ND) sememangnya salah satu aksesori yang diidamkan oleh para "landscaper" terutamanya bagi mereka yang gemar membuat dedahan panjang (long exposure). Secara teorinya, perkataan "neutral" membawa maksud filter tersebut tidak akan meninggalkan sebarang kesan "cast" warna pada gambar. Namun realitinya, tiada filter yang betul-betul neutral. Filter-filter ND seperti Hoya, Hitech, BW malah Lee System masing-masing mempunyai karakter cast warna yang tersendiri.

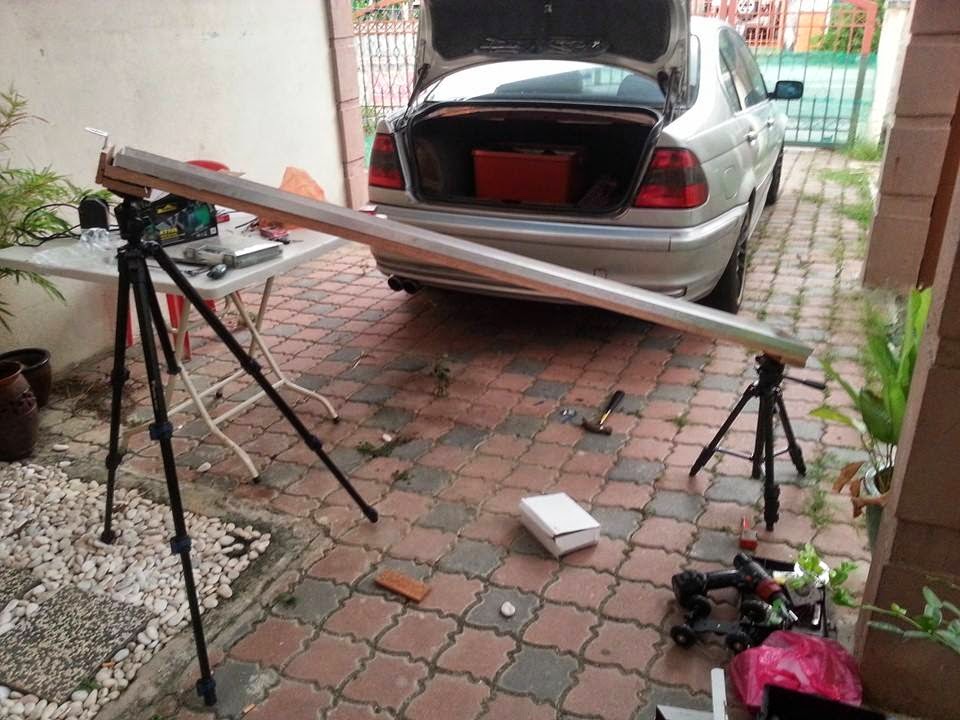
Semalam (Jumaat 13-06-2014) saya telah berkesempatan membuat satu ujian perbandingan cast warna antara dua jenama filter, di antara "juara bertahan" Lee "Big Stopper" dan pendatang baru, Haida ND3.0. Kedua-duanya adalah mempunyai nisbah pengurangan cahaya sebanyak 10 "stops", sesuai untuk dedahan panjang bagi medapatkan efek "air berkabus" dan "awan larik-larik" (sekadar memetik terma yang selalu digunakan oleh rakan rakan fotografi saya). Saya juga menguji Haida ND1.8 (6 stops) yang baru sampai ke tangan saya.

Ketiga-tiga filter adalah jenis segi empat "square" 100mm x 100mm dan diuji menggunakan holder jenama "Serk".

Sebagai ukuran perbandingan, terdahulunya saya mengambil dedahan-dedahan tanpa sebarang filter dalam 3 setting "white balance" :
- Auto WB
- Daylight preset
- Kelvin 7960 (yang menghasilkan WB paling hampir dengan apa yang mata saya lihat ketika itu)

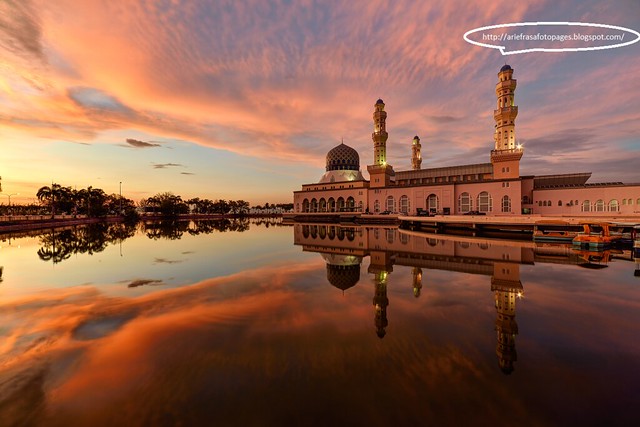
Ujian dilakukan di Putrajaya, bermula dari pukul 6.30 petang hingga 6.40 petang dengan kedudukan matahari condong di sebelah kiri.

Semua gambar-gambar adalah SOOC (terus dari kamera) jpeg tanpa sebarang suntingan.

Gambar-gambar "benchmark" tanpa filter :


Ujian pertama adalah untuk juara bertahan, Lee Big Stopper :


Seperti yang dapat dilihat di atas, Big Stopper menghasil cast biru yang ketara pada setting Auto WB, Daylight dan juga pada Kelvin 7960, jadi saya membuat satu lagi ujian pada Kelvin 10000, iaitu setting kelvin paling tinggi dalam kamera cabuk saya ini. Pada Kelvin 10000, masih lagi terlihat cast biru, namun bagai saya boleh diperbetulkan dalam "post processing".

Tibalah masa untuk menguji "pencabar" takhta, Haida ND3.0 :


Pada hemat saya, pada setting Auto WB, Haida ND3.0 menghasilkan cast warna yang hampir sama dengan gambar tanpa filter pada setting yang sama. Manakala pada setting "Daylight" cast kebiruan agak ketara. Dan pada setting Kelvin 7960, cast yang terhasil adalah sedikit "warm" melebihi gambar tanpa filter pada setting yang sama. Dan untuk Kelvin 10000, gambar terhasil adalah sudah terlalu "panas". Walaubagaimana pun ini semua boleh dibaiki dalam post-processing.

Jadi pada hemat saya, Haida sesuai digunakan menggunakan setting Auto WB (bagus untuk yang malas menukar setting), atau julat kelvin dari 5600 - 8000 untuk hasil yang lebih natural. Dan bagi mereka yang suka "extra warm" bolehlah menggunakan kelvin yang lebih tinggi dari itu.

Seterusnya saya menguji Haida ND1.8 (6 stops) yang memberikan hasil yang sama :


Kedua-dua Haida ND3.0 dan ND1.8 adalah menggunakan material "schott glass" jadi tidak hairan lah hasilnya pun sama. Haida ND0.9 (3 stops) juga dari bahan yang sama jadi walaupun tidak diuji disini, saya jangkakan hasil yang sama juga boleh diperolehi.

Sekarang kita tengok perbandingan sebelah menyebelah filter-filter tersebut :

1. Auto WB :


2. WB Daylight Preset :


3. WB Kelvin7960 :


4. WB Kelvin 10000 (tiada gambar untuk tanpa filter) :


Seterusnya saya juga mencuba kombinasi filter-filter ND tersebut dengan dua filter lain iaitu
- Formatt Hitech Reverse Grad 0.6
- Lee System Soft Grad 0.9

N/B : Setting WB yang digunakan adalah kelvin 10000 sahaja

Hasil padanan dengan Lee Big Stopper :


Hasil padanan dengan Haida ND3.0 :


Hasil padanan dengan Haida ND1.8 :


Pada hemat saya :

- Cast biru yang dihasilkan oleh Big Stopper telah membatalkan atau me"neutral"kan cast magenta/purple dari Hitech Reverse Grad.

- kombinasi Haida dengan Lee GND adalah amat baik sekali, lebih baik dari kombinasi Big Stopper + Lee GND. 

- kombinasi Haida dengan Hitech adalah kurang sesuai disebabkan oleh cast Haida yang sedia agak "warm" telah "menaikkan" lagi cast magenta/purple Hitech tersebut.

N/B : Namun, harus diingat bahawa ujian kombinasi ini dilakukan pada Kelvin 10000 yang kita maklum adalah melebihi julat kesesuaian setting WB untuk Haida pada ketika itu. Mungkin jika menggunakan setting Auto WB atau kelvin yang lebih bersesuaian, cast magenta Hitech itu akan tidak terlalu ketara? Saya akan cuba buat ujian lagi sekiranya berkesempatan, insyAllah :)


Kesimpulan :

Saya adalah pengguna Lee Big Stopper semenjak sekian lama. Tidak dinafikan ada ketikanya cast biru yang dikeluarkan membuatkan saya agak "frust" (walaupun ianya boleh diperbetulkan dalam post processing) kerana warna hasil yang terpampang di LCD kamera tidak sama dengan apa yang saya lihat.

Dengan adanya Haida, kini penggemar dedahan panjang mempunyai alternatif filter yang mampu menghasilkan kualiti warna yang sama baik (atau lebih baik?) dari Big Stopper. Pada separuh harga Big Stopper, bagi saya Haida adalah pilihan yang berbaloi sekali!

# Big Stopper didatangkan dengan gasket getah yang sedia dilekatkan bagi mengelakkan "light leak".

# untuk Haida, gasket juga dibekalkan dalam bentuk "foam tape" namun ianya TIDAK dilekatkan - anda perlu lekatkannya sendiri.

# Haida ND3.0 (10 stops), ND1.8(6 stops) dan ND0.9 (3 stops) boleh diperolehi pada harga RM400/- sahaja, manakala holder jenama "Serk" boleh diperolehi dengan harga RM200/- sahaja.

# Mesej saya di facebook untuk membuat tempahan :)


Sehingga pos saya di masa akan datang,
Wassalam.


-----------------------------

 HDR/DRI/Timelapse personal / group workshop is available upon request. PM me for details :) 
- all rights reserved - all images/footages in this blog are copyright of the respective photographer - do not use without permission -
- contact me for information on licensing of my images and timelapse clips - 


Thursday 12 June 2014

My Timelapse Is On Motion Slider!

Assalamualaikum wbt

AlhamduliLlah, after months of trial and error, I am now a proud owner of DIY motion slider. At 6 feet long, it was long indeed, I can barely put it in my sedan, occupying the entire left seats in the process. My car is now for 2 persons only, haha!


I have lusted after the motion slider for quite sometimes, since the camera motion can add impact to the timelapse that no amount of "motion effect" in post-processing can replicate (not to my limited knowledge, anyway). Sadly the costs of owning one is quite prohibitive!

I am being who I am, I resorted to the DIY route. First, research at Youtube to get an idea of how to do it. There are many tutorials there, from the simplest hand-pushed slider to the ultimate programmable stop-motion slider. I settled for a simple continuous motion slider. Since my slider is long by the shop standard (all sliders that I window-shopped are in the region of 60cm -120cm) I figured that a very slow motor will do just fine for my needs.

Long ago, (February)I bought one DC 12v, 2rpm (yes, TWO revolution per minute) motor at e-bay for approx. rm55/-, and a speed controller for rm40/-. Then I bought four circular bearings for rm80/-. For the slider I figure out I could buy the stainless steel pipe at the local hardware shop.

Unfortunately the bearing was 16mm inner diameter, while the smallest diameter stainless steel pipe that I could find is also 16mm. A very tight fit, and to make matters worse, one of the pipes was slightly bent. The sliding action was not smooth at all.

There the matter ends for some time, the DIY-ist in me laid dormant..until suddenly it awoke with renewed passion. Ha!

Last year I bought a skater for camera (I can't figure out why I did) so incorporated it into my design. I bought L-shaped aluminium as the slider, and reinforced it with wood. For drive system, I coupled the motor with fishing reel as pulley, and used the fishing line as to reel the platform.

here's how it looks :


It was very bulky and unwieldy, but suprisingly it works! Here's the slider at shooting location :


The test result can be seen here at my facebook. The longest time I could achieve is 1 hour, good enough for sunset/sunrise but not for milky way.

Of course I was not satisfied. The slider was wobbly, and the skater's alignment was never true so the camera was not moving in single straight line, rather it would veer off to one side resulting wobbly video that needs to be stabilised. Plus, since the skater/camera combo was not secured to the slider, it could topple over easily, which could leads me to ruin since this is the only camera/lens that I have!

Back to drawing board. I ordered 4 new bearings, this time 20mm inner diameter. I also ordered timing belt and pulleys, in order to get longer running time. When the bearings arrived, I bought 3/4 inc diameter stainless steel pipe, and it fits in bearings nicely. For camera platform, I used my wife's chopping board (it the only thing that I could think of that time, plus it was available in the kitchen - oh  if you could see her face when she found out! hahahaha..).


After repeated tests at home, it was time for on-field test. The behind the scenes video here at my facebook.

And it works..beautifully! The longest duration now is 1 hour 35 minutes, and it was steady, I hardly need to do any post-shoot stabilisation.

Of course there's a room for improvement..I already working on the better design and I also now slowly reading the Arduino programming lessons for the stop-motion, but for now this DIY slider fulfils my needs nicely :)

In the meantime, do enjoy these videos :


Do watch in HD for maximum viewing pleasure :)

Some still image from the sequence :


Until my next post,
wassalam.


-----------------------------

 HDR/DRI/Timelapse personal / group workshop is available upon request. PM me for details :) 
- all rights reserved - all images/footages in this blog are copyright of the respective photographer - do not use without permission -
- contact me for information on licensing of my images and timelapse clips - 

Monday 26 May 2014

Sabah, Land Below The Wind


Sabah in timelapse. I have been to Sabah quite a few times already, and each time I came back satisfied, and wanting to return for more!

Truly, from the mountain to its tropical islands, Sabah is paradise for landscape photographer.

Time lapse location (not in order) : Kota Kinabalu, Kundasang, Tambotuon, Kuala Penyu, Mabul Island, Labuan.

Song : "Paradise" by Coldplay (instrumental)


Do watch in HD for maximum viewing pleasure :)

Until my next post,
wassalam.


-----------------------------

 HDR/DRI/Timelapse personal / group workshop is available upon request. PM me for details :) 
- all rights reserved - all images/footages in this blog are copyright of the respective photographer - do not use without permission -
- contact me for information on licensing of my images and timelapse clips - 

Monday 12 May 2014

An Epic Sunset At The City Mosque

Assalamualaikum wbt.

Timelapse : an epic sunset at the beautiful City Mosque, Likas, Kota Kinabalu, Sabah. for more than 2 hours, the sky dazzled us with an awesome display of changing hues and colours. Possibly one of the best sunset that I had ever witnessed. SubhanaLlah!

Do watch in full screen HD for maximum satisfaction :)

Techs yada-speak :
Sequence : 384 shots
Interval : 10 seconds
Gear : Nikon D600 + Samyang 14mm + Nikon Wu1b + Dslr Dashboard running on Galaxy Note 2 + Phottix intervalometer
Exif : (start) f/8 | AutoWB | ISO50 | 1/100s
(end) f/8 | AutoWB | ISO100 | 5s


Still image here :

City Mosque

Until my next post,
wassalam.


-----------------------------

 HDR/DRI/Timelapse personal / group workshop is available upon request. PM me for details :) 
- all rights reserved - all images/footages in this blog are copyright of the respective photographer - do not use without permission -
- contact me for information on licensing of my images and timelapse clips - 

Tuesday 15 April 2014

The Call To Prayer

Assalamualaikum wbt.

A timelapse compilation of mosques in few places in Malaysia, shot during sunrise and sunset. For this compilation, the most fitting soundtrack would be the call to prayer itself, and I had the pleasure of choosing this Azan rendition by Muadzin Hafiz Mustafa Özcan from Turkey. Such a beautiful voice!


The Adhān (Arabic: أَذَان‎ [ʔaˈðaːn]), or Azan, Ezan, Azon (as pronounced differently in at different places), is the Islamic call to worship, recited by the muezzin at prescribed 5 times of the day.

The adhan sums up our Shahadah, the Statement Of Faith:  

"I bear witness that there is no god but Allah, and I bear witness that Muhammad is the Messenger of Allah."

Truly.

The verses of Azan and it's English Translation :

Allahu Akbar (4x)
English: Allah (God) is [the] Greatest.

Ash-hadu an-la ilaha illa Llah (2x)
English: I bear witness that there is no god except Allah.

Ash-hadu anna Muħammadan-Rasulullah (2x)
English: I bear witness that Muhammad is the Messenger of Allah.

Hayya 'ala s-salah (2x)
English: Come to prayer.

Hayya 'ala 'l-falah (2x)
English: Come to success.

Allāhu Akbar (2x)
English: Allah is [the] Greatest.

La ilaha illa-Allah (1x)
English: There is no god except Allah.

Until my next post,
wassalam.


-----------------------------

 HDR/DRI/Timelapse personal / group workshop is available upon request. PM me for details :) 
- all rights reserved - all images/footages in this blog are copyright of the respective photographer - do not use without permission -
- contact me for information on licensing of my images and timelapse clips - 

Thursday 10 April 2014

Mirror Sunrise At Darul Quran

Assalamualaikum wbt.

AlhamduliLlah, after a few visits to DQ, on last Febuary 2014 the weather finally symphatise for me hehe...on previous visits I was not so lucky!

Darul Quran is an institute of higher education specializing in the memorization of the Quran and also other fields of Islamic studies. Darul Quran is under the purview of Malaysia's Department of Islamic Development or better known as JAKIM. This campus started operating in November 1998.


Getting there :

From KL, I normally take the North-bound PLUS Highway, exiting at Rawang. Then from Rawang I just head straight to Kuala Kubu Baru on Route 1. Approximately 22kms, take a right turn to Jalan Ampang Pechah. 5km later, you'll reach Darul Quran on your right. 

In each of my visit to DQ, I would always be welcomed by two of the lecturers there, affectionally called as Ustaz An-Namir and Ustaz Buyie. Extremely talented photographer themselves, Ustaz An-Namir, and Ustaz Buyie often played a warm and welcoming hosts to numerous photographers visiting DQ for a chance to capture the beautiful DQ during sunrise. JazakumaLlahu khairan, ya akhi! :)

The Beautiful Darul Quran Mosque, Kuala Kubu, Selangor.
Nikon D600 | Tamron 17-35mm | f/5.6 | 1/40s | ISO50

The mosque pictured here is situated at a lakeside (unoficially) named "Tasik Huffaz". On a windless day, the surface of the lake is mirror smooth, resulting in perfect reflection image. Satisfaction guaranteed! :)

This photo is one of the 789 images of timelapse sequence..possibly the longest that I did so far, from pitch dark untill well past sunrise! I'm processing the timelapse now, so stay tuned! :)

Till then, wassalam.

*Updated 12/04/2014*

The timelapse is now LIVE at Youtube :)


Till my next post,
Wassalam.

-----------------------------

HDR/DRI/Timelapse personal / group workshop is available upon request. PM me for details :)

- all rights reserved - do not use without permission -

- contact me at enquire.ariefrasa@gmail.com for information on licensing of my images and timelapse clips
View my Most Interesting In Flickriver.
Visit my flickr | 500px | Getty Images | Pond5 | facebook | pinterest | twitter | imagekind | World Images


Royalty-Free Stock Video at Pond5 Royalty-Free Stock Video at Pond5

Monday 7 April 2014

Pond5 Tips : Files Association Request

 Assalamualaikum wbt.

Oleh kerana dibodek kaw2 oleh Akula Matiau tadi, tetiba datang laa mood rajin nak buat tutorial ni. Jadi sempena tengah rajin ni, saya berkongsi dengan rakan2 Microstockers Malaysia tentang cara membuat "files association request" di Pond5. :D

1) Kenapa?

- untuk "synchronise" klip pelbagai resolusi yang kita dah submit kat Pond. Katakan kita submit 3 resolusi berlainan untuk satu klip yang sama (720p, 1080p, 4K) - makanya nanti akan terdapat 3 page berasingan. Jadi dengan cara clip association ini, ketiga-tiga klip kita itu akan muncul dalam satu page - tak kira potential buyer cari dan klik apa resolusi sekalipun. More choice = more likely sale, tak gitu? Ataupun mungkin dia cari res 720p, tapi bila dia lihat ada 4K, mungkin dia tergerak nak beli 4K res? Mana tahu, kann.. :)

- Contohnya, seperti klip ini, saya submit tiga klip berlainan resolusi secara berasingan, tapi bila disatukan, kesemua resolusi muncul dalam satu page :


2) Bagaimana?

- Mudah sahaja! Di page "upload" anda, perhatikan nombor ID klip-klip tersebut. Setiap klip akan mempunyai ID yang berbeza, seperti ini :


-  Hint : saya buat clip association SEBELUM saya buat apa-apa edit pada nama, tagging etc. Dengan cara itu, setiap klip akan disusun mengikut fail nama asal, dan biasanya akan disusun bersama, mengikut turutan. Jadi mudah untuk disalin tanpa KELIRU. Lebih-lagi kalau kita buat banyak klip dari satu sumber sekuen. Sebagai contoh : 3 klip dalam set A pada gambar di atas (bulatan merah) adalah dari sumber sekuen imej yang sama dengan set B, tapi dengan efek yang berbeza. Sudah tentu saya tak mahu klip dari set A muncul dalam page untuk klip set B, bukan? Jadi, setelah melalui beberapa proses "trial & error", ini lah  petua yang "mujarab" untuk saya :).

 - buka satu dokumen "wordpad". Mulakan dengan ayat ini (err..mulakan dengan Bismillah di dalam hati ye, lebih afdhal :p ) :

ID/ Username : xxx  <---- xxx = username anda


- baris berikutnya, taip perkataan "Item : " kemudian salin (copy & paste je) nombor ID klip-klip tadi dan susun dalam satu baris. Buat baris baru untuk set yang lain. Lihat gambar untuk lebih senang faham :)


- jaga-jaga, jangan tersalah susun ID dari set yang berlainan! Dah siap, simpan list ini sebagai template anda untuk diguna lagi di kemudian hari.

-  edit keyword klip-klip anda dan submit kepada reviewer (pond5 panggil "curator").

- selepas anda submit klip-klip anda yang osem-osem iteww, buka email anda, compose new email dan copy & paste senarai anda tadi. Alamatkan email ke support@pond5.com dengan tajuk ASSOCIATION REQUEST.


- lantas saja hantar email itu, tak perlu tunggu klip diluluskan.

- anda akan dapat email balas dari pond5kelak. Tahniah! Sukses la tu.. 


 - itu sahaja. selamat beramal! :)


-----------------------------
 HDR/DRI/Timelapse personal / group workshop is available upon request. PM me for details :) 
- all rights reserved - do not use without permission -
- contact me at enquire.ariefrasa@gmail.com for information on licensing of my images and timelapse clips -
Royalty-Free Stock Video at Pond5 Royalty-Free Stock Video at Pond5